Showing posts with label Baking. Show all posts

Sunday, July 1, 2012

Little Debbie's Oatmeal Cream Pies


Who doesn’t have a soft spot in their heart (or stomach) for Little Debbie’s delectable treats? When it comes to her Oatmeal Cream Pies, I sure do!

This recipe is courtesy of my own Little Debbie, fellow nurse at Sacred Heart! Debbie is a fabulous baker and after trying her oatmeal cream pies I knew I wanted to give them a try. They were not hard to make and turned out fabulous! Make sure to give yourself plenty of time when baking these, since you need time while the cookies cool.

Oatmeal Cream Pies
Ingredients:
Cookies:
1 ½ c. flour
1 tsp. baking soda
½ tsp. salt (I never add salt you know!)
¼ tsp. ground cinnamon
3 c. uncooked oats
1 ¼ c. (2 ½ sticks) unsalted butter, softened
1 c. firmly packed light brown sugar
½ c. white sugar
1 large egg
2 tsp. vanilla extract
Cream filling:
6 tsp. unsalted butter, softened
2-3 oz. cream cheese, softened
2 c. powdered sugar
2 Tbps. heavy cream
1 tsp. vanilla extract

Cookies:
Preheat oven to 375*. Line baking sheet with parchment paper or a silicone baking sheet.
Wisk together flour, baking soda, salt, and cinnamon. Stir in oats. Set aside.
Beat butter, brown sugar, and sugar until creamy. Add egg and vanilla. Gradually add the flour mixture and mix well.

Using spoons, make rounded tablespoons and drop onto baking sheet. Bake 9-11 minutes. Allow the cookies to set on the pan for a couple minutes before removing to cooling racks. Allow cookies to fully cool before sandwiching.


Cream Filling:
Combine all ingredients and beat until combined. Increase the speed and mix till light and fluffy.

Match cookies so that each one has a comparable sized partner. Spread about 1 tablespoon of filling over the bottom side of the cookie. Then top with the cookie's partner, so that flat sides are together, with cream, creating a sandwich.
I packed up my oatmeal cream pies into a tin and took them across the country to Topsail Island, North Carolina for a 4th of July on the beach with my family! They loved them!!!
Adapted by my own Little Debbie from Bake or Break Recipes.

Glazed Lemon Icebox Cookies

This a famous cookie from our fabulous neighbor Jeanne! It is a wonderful travel cookie so its great for presents or mailing! Normally they are not pink, but you know my love for pink!

Glazed lemon icebox cookies
¾ c. (1 ½ sticks) unsalted butter, at room temp
¾ c. granulated sugar
2 ½ - 3 egg yolks
½ tsp vanilla extract
¼ tsp kosher salt
2 c. flour
1 c. powdered sugar
2 Tbsp. lemon juice
1 tsp grated lemon zest (OK to skip)

With electric mixer, beat the butter and the granulated sugar until fluffy. Add the egg yolks, vanilla, and salt; beat to combine. Gradually add the flour, mixing until just incorporated.

Divide the dough in half and shape into 1 ½ -inch diameter logs. Wrap in wax paper and then plastic wrap and refrigerate until firm, about 30 min.
Heat oven to 350*. Slice the logs into 3/8" thick pieces and space them apart on a baking sheet (lined with parchment paper or a silicone baking sheet. Bake until barely golden, 16-20 minutes. Then transfer to cooling racks to cool completely. (Error on the side of less is better, because you only want the bottom to be slightly golden.)


In a small bowl, whisk together the confectioners' sugar, lemon juice, and lemon zest until it forms a thick but pourable glaze, adding more lemon juice if necessary. Dip the top of each cookie into the glaze and let set about 15 min. (I just spooned some glaze on each cookie and then Maria followed me with a knife to smooth it out.) I added some pink food coloring to half the icing because I wanted some to be pink. However, I do think that they look better left alone, white.
To Freeze: Rather than refrigerating the dough, you can wrap up the logs and freeze. To bake, thaw just enough to slice the log and bake like above, using the upper end of the time range.

Recipe courtesy of my fabulous neighbor Jeanne! Thanks for the most amazing cookies always!

Monday, February 6, 2012

Banana Spring Rolls with coconut ice cream

On a recent date night at PF Chang’s I was craving the banana spring rolls. It gave me the idea that maybe I could try making them. So I did a bit of online searching and recipe comparing and had a go at it. Yum! They were so good, and luckily I took pictures as I went so that I could share it with you!

Banana Spring Rolls
Ingredients:
Ripe bananas (I think smaller better)
Egg Roll Wrappers
¼ c. brown sugar with some cinnamon, ginger, and cloves sprinkled in
Oil for frying (I know bad, but you just can’t bake these)
Coconut pineapple ice cream (get the Haagen-Dazs kind!)
Caramel sauce
Strawberries or raspberries

Heat the oil in a large skillet. You should heat it to 350* but I don’t have a thermometer so I just turn it on medium heat while I get everything ready. Put your brown sugar and spice mixture into one bowl and then put some water into another little bowl. Peal your bananas and cut in half (hamburger style). You could also cut them in half again (hotdog style) if you want them skinnier. Roll your banana in your sugar mixture, patting some on too. Put your egg roll wrapper down with a corner facing you. Place the banana on the wrapper like so.

Wrap the bottom of the wrapper up over the banana. Fold the sides in. Continue to roll it up. Dip your finger in the water and run along the final corner of the wrapper so that it gets sealed down. Assemble your banana rolls before you begin frying. Fry one or two spring rolls at a time, turning so that they are cooked evenly around. The oil should bubble calmly around the spring roll. If it doesn’t bubble when the spring roll is put in then it is not hot enough. It should not be boiling though! (You don’t want to get hurt!) When the spring roll has a nice golden color and little bubbles on it, remove it from the heat, letting the excess oil drain off.

Using a serrated knife, cut the spring roll in half at a nice angle. Arrange on plate with a scoop of ice cream and your raspberries or cut up strawberries. Then drizzle it all with your caramel sauce. Serve immediately so that spring rolls are warm and ice cream doesn’t melt! Enjoy!


Banana Spring Roll Caramel Sauce Anecdote:  I needed caramel sauce for the spring rolls. My thoughts were something like this: I don’t want to buy just Smucker’s caramel sauce; real bloggers would make their own caramel sauce and then show everyone just how easy it really is. Well, when your caramel sauce recipe includes the phrase “pour the cream in all at once and continue to whisk but move away as far as possible as the sauce will immediately burst into a violent boil” you should beware and recognize that this doesn’t sound good. Well, long story short I never left the side of the caramel and never stopped whisking, but somehow instantaneously it looked like this.
Hahaha! Moral of the story: if you are a real life blogger like myself, buy the Smucker’s caramel sauce right up front!

Sunday, January 15, 2012

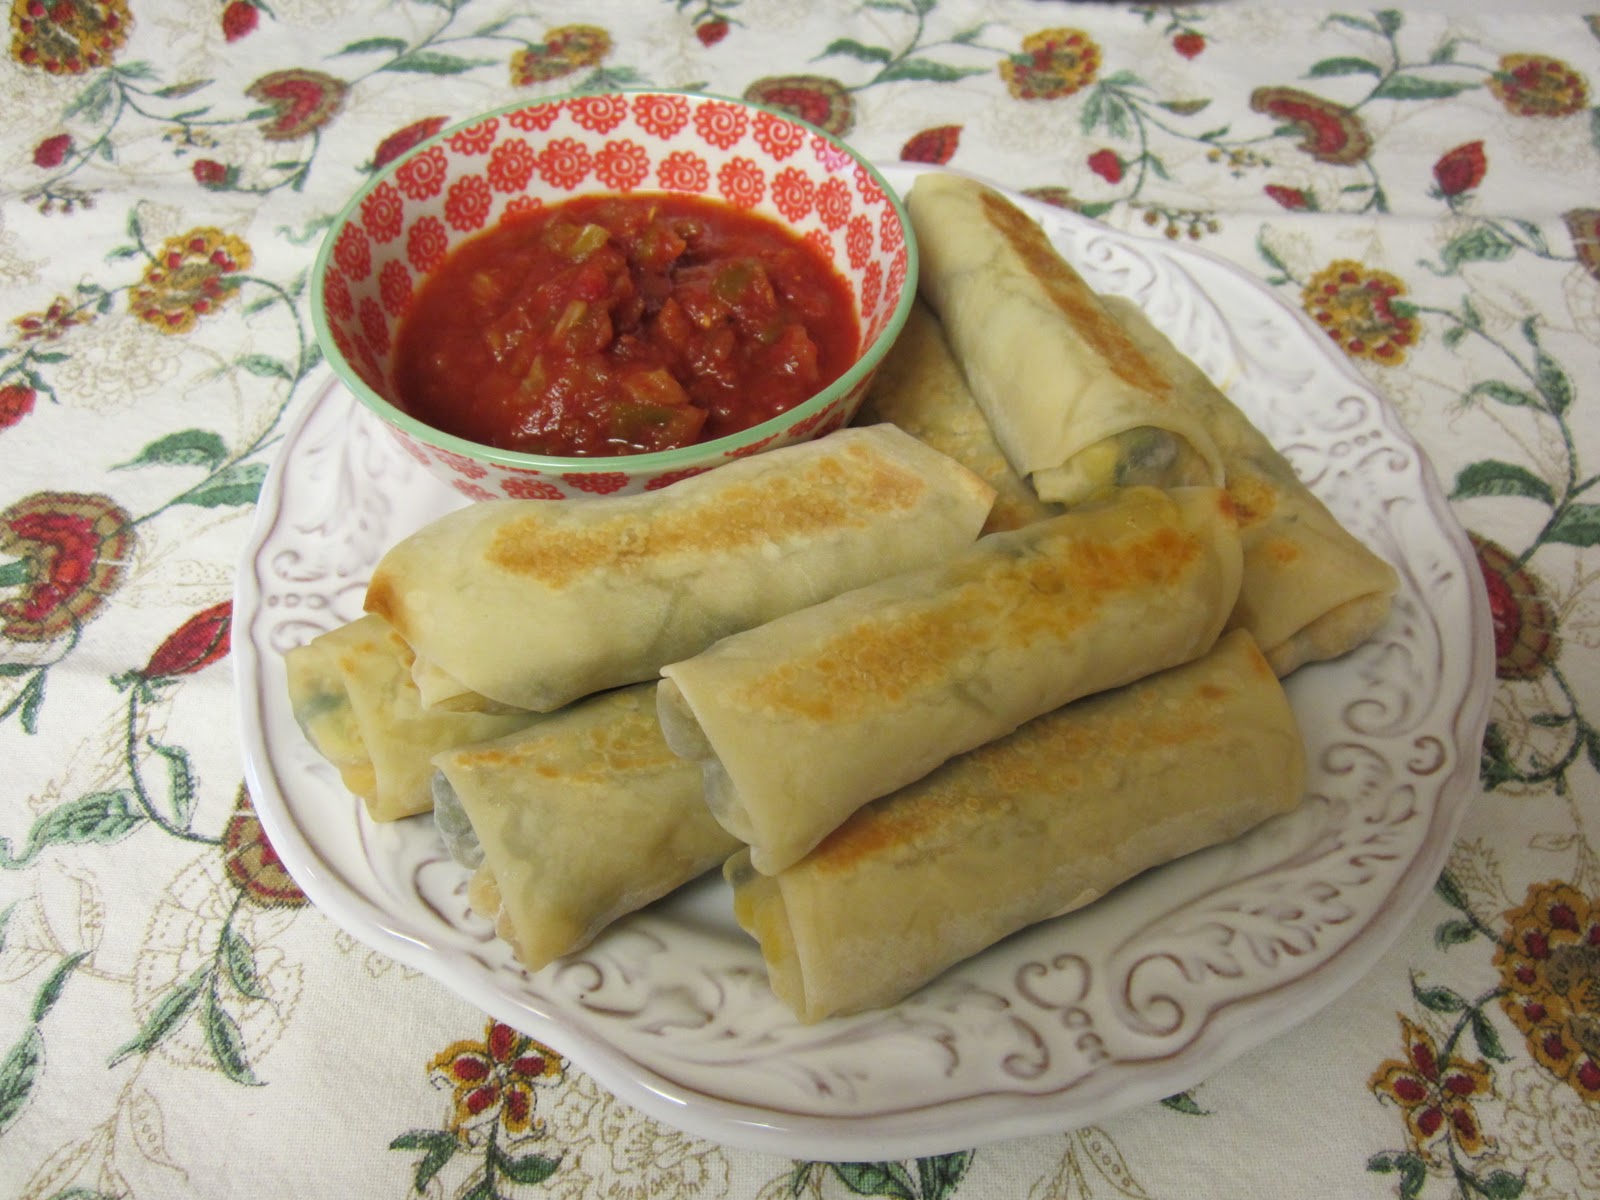
Southwest Chicken Eggrolls


Ok, so I was going to a family event (not my own family though), and I wanted to bring something of course! However, this family is not crazy for the treats and desserts like my own. So that kicked out most of my ideas. I wanted to make an appetizer, but something new and different. I combined two different recipes to get these southwest chicken eggrolls. If you yourself are looking to be a bit healthier in the New Year or are cooking for a healthy group, these are a great appetizer! Unlike most eggrolls, these are not fried, but baked.

Southwest Chicken Eggrolls

Ingredients:
1 large chicken breast, diced 
½ c. lime juice
1/3 c. olive oil
1 tsp. minced garlic
1 tsp. honey
2 c. frozen corn, thawed
1 can (15 oz.) black beans, rinsed and drained
1 package (10 oz.) frozen chopped spinach, thawed, drained, and squeezed out
2 c. shredded Mexican cheese (cheddar, jack, Monterey, and mozzarella if you want to do it yourself)
1 can (4 oz.) diced green chiles, drained
4 green onions, chopped
1 tsp. ground cumin
½ tsp. chili powder
½ tsp. pepper
¼ tsp. cayenne pepper (use more if you aren’t  a spice wienie like me)
1 package egg roll wrappers (20-25)

If you have time combine the first five ingredients and let them marinate.
Heat skillet on med-high heat. Combine first five ingredients (chicken through honey). Add to skillet and cook chicken. I try to cut chicken up even smaller while it is cooking. After letting it cook in the juices, pour the juices out of the pan. Add a smidge of butter and continue to cook the chicken a bit longer to give it a nice color.
Preheat oven to 350*. After rinsing and straining your various cans and packages, combine everything (besides the egg roll wrappers) in a large bowl. Add the chicken in too. Mix it all up. Lightly spray your cooking sheet with Pam.
Squeeze the spinach as dry as you can
The mixture isn't that appetizing...
Separate an egg roll wrapper and lay down with a corner facing you. Put a ¼ cup of your southwest mixture slightly south of the middle of the square. Start rolling from the corner closest to you shaping it into eggroll shape. Fold in each of the side corners. Finish rolling it all the way up. Dip your finger in some water to seal the corner down. Place egg roll on baking sheet with folded corner underneath.


After rolling all of your eggrolls, lightly spray the tops of the eggrolls with your cooking spray (or you could brush them lightly with melted butter). Bake for 15 minutes, rolling them halfway through. Serve warm with some salsa, guacamole, or sour cream (plain yogurt is a healthy alternative to sour cream).

Adapted from the Tasty Kitchen (Pioneer Woman Cooks) and Annie’s Eats

Tuesday, December 20, 2011

Whipped Shortbread with Candy Canes


And the baking with my mom continues! I am having a Christmas tea party with my cousins and aunties. Rather than making the traditional Christmas cookies I wanted something a bit more dainty looking. These are simple and very pretty looking. These delicate white cookies just melt in your mouth!

Whipped Candy Cane Shortbread

1 c. Butter (do not use margarine)
½ c. Powdered Sugar
1 ½ c. Flour
Mini Candy Canes

Break candy canes into pieces. I put them in a Ziploc and then hit them against the counter so that they just break up but don’t get crushed. I’m sure Williams—Sonoma makes a tool to do this!

Cream butter and sugar; add flour and beat for 10 minutes. (this works much better with an electric hand mixer, rather than a kitchen aid). Set the timer because they need to be whipped for a full 10 minutes! Drop from small spoon onto cookie sheet. Decorate with a bit of candy cane. Bake at 350* for about 10-12 minutes, until the bottoms are lightly browned. I like to bake them so that they don’t start to brown and still look nice and white. I make them small so it makes about three-dozen cookies.

Adapted from the Best of the Best Cookbook


Cranberry Pistachio Bark

The only thing better than my mom’s cooking, is being at home to cook with her!
I thought that since I have done some Christmas crafts, it was time for some Christmas baking. These are two Christmas treats that only require a couple of ingredients, which is always nice and simple!  This bark looks great at Christmas with the green pistachios and red cranberries. Also this bark makes a wonderful treat for Christmas gift-giving.

Cranberry Pistachio Bark

1 lb. good quality white chocolate (just don’t use chocolate from a craft store!)
¾-1 c. dried cranberries
¾-1 c. shelled pistachios (Be sure and buy extra so you can bribe the sheller!)

Melt chocolate in the top of a double broiler. Be sure to keep stirring. Let cool to room temperature. 

Roast pistachios at 350* for 5-7 minutes (less if you buy roasted pistachios). Line a 10”x15” edged cookies sheet with wax paper or foil. Stir cranberries and pistachios into melted chocolate. Pour onto lined cookie sheet and spread out to meet the edges. Refrigerate for at least 1 hour. Then break into pieces and enjoy!


Adapted from the Best of the Best Cookbook

Wednesday, November 30, 2011

Pumpkin Cream Cheese Muffins

YAY my first blog posting ever!  I thought I’d start out with my most recent favorite recipe, despite the lack of glitter and ribbons!  This past month I have been a pumpkin cooking monster- making everything from pumpkin puree to pies to steel cut oatmeal.  However, the best recipe that came from this pumpkin craze was pumpkin cream cheese muffins.  These muffins are out of this world.  They give the Starbucks pumpkin cream cheese muffin a serious run for their money.  Although this muffin has the cream cheese center, if you’re not a fan of the cream cheese gooey yumminess, you could leave it out for a fabulous not too plain pumpkin muffin.  The recipe makes 24 muffins.  You are most likely thinking “oh I’ll half it since I don’t know if they’re good yet.” Well don’t!  The 24 muffins will be gone way too fast.  Also these muffins take a bit of time between prepping and making so plan ahead. 


Pumpkin Cream Cheese Muffins
Ingredients:
For the filling:
8 oz. cream cheese, softened
1 cup powdered sugar

For the muffins:
3 cups all-purpose flour
1 tsp. ground cinnamon
1 tsp. ground nutmeg
1 tsp. ground cloves
1 tbsp. plus 1 tsp. pumpkin pie spice
1 tsp. baking soda
4 large eggs
2 cups sugar
2 cups pumpkin puree (1 can)
1¼ cups vegetable oil

For the topping:
¼ cup sugar
2-3 tbsp. flour
1 tsp. ground cinnamon
2 tbsp. cold unsalted butter, cut into pieces

Directions:
To prepare the filling, combine the cream cheese and confectioners' sugar in a medium bowl and mix well until blended and smooth.  Transfer the mixture to a piece of plastic wrap and shape into a log about 1½-inches in diameter.  Try not to get the entire piece of plastic wrap covered in the filling because it will get all stuck together.  Smooth the plastic wrap tightly around the log.  Then wrap the log in tin foil so that it will be sturdier.  Transfer to the freezer and chill until at least slightly firm, at least 2 hours.

To make the muffins, preheat the oven to 350˚ F.  Line muffin pans with paper liners.  In a medium bowl, combine the flour, cinnamon, nutmeg, cloves, pumpkin pie spice, and baking soda; whisk to blend.  In the bowl of an electric mixer combine the eggs, sugar, pumpkin puree and oil.  Mix on medium-low speed until blended.  With the mixer on low speed, add in the dry ingredients, mixing just until incorporated.  

To make the topping, combine the sugar, flour and cinnamon in a small bowl; whisk to blend.  Add in the butter pieces and cut into the dry ingredients with a pastry blender until the mixture is coarse and crumbly.  I don’t have a pastry blender but if you use two forks or two butter knives it works fine.  Transfer to the refrigerator until ready to use.

To assemble the muffins, fill each muffin well with a small amount of batter: just enough to cover the bottom of the liner.
Slice the log of cream cheese filling into 24 equal pieces.  If you only have one muffin pan then cut the log in half (through the tin foil) leaving one half in the freezer and cutting the other half into 12 pieces.
Place a slice of the cream cheese mixture into each muffin well.  Divide the remaining batter among the muffin cups, placing on top of the cream cheese to cover completely.  Sprinkle a small amount of the topping mixture over each of the muffin wells.

Bake for 20-25 minutes.  Transfer to a wire rack and try your best to resist the temptation and let them cool.
I hope you enjoy these muffins as much as we did! Let me know if you 
have questions or suggestions!


Source: Annie's Eats