Sunday, March 11, 2012

St. Pat’s Potato Famine Dessert


St. Pat's Ice Cream Potatoes

This is such a fun dessert to make to celebrate the Irish on Saint Patrick’s Day! My sisters and I always looked forward to my mom making these for us on St. Pat’s. So I thought it only appropriate that I give it a try on my own and share the fun with you. Your friends and family will be so impressed with your creativity when you serve these cute potatoes complete with tasty 'sour cream and chives' for dessert.

Ingredients:
Good vanilla icecream (or the Breyers white mint)
Chocolate milk powder
Coconut
Green food coloring
Whipped cream

Begin by mixing your coconut with a couple drops of green food coloring. Mix up well. Set aside your chives in an airtight container or baggy.

The name of the game is hot potato, but in this game you are the hot one and the potato is cold so be quick with your potato handling!

Scoop out your ice cream and then with one hand in a plastic bag shape it quickly into a nice potato shape. Put the potatoes in a container with a lid so that none of your potatoes are touching each other. Return to freezer.

Put your chocolate milk powder in a plastic baggy. Remove your potatoes from the freezer. Carefully put a potato in the baggy and shake it around so that the potato gets evenly coated with the cocoa powder. Pull the potato out and return to your container with minimal touching. Once all your potatoes have been given a nice brown skin return them to the freezer until you are ready to serve.

Garnish each potato with a bit of whipped cream to look like sour cream and some of your chives. Serve and enjoy this tasty and creative treat!

Wednesday, February 8, 2012

Owl Love Your Hair Clips

Owls are in right now so of course I had to make a valentine that was owl themed! This was tons of fun to make and the creative options are endless. Like most girls, I probably have way too many hair clips. As you know, I love ribbons! So I’ve started clipping them all to a ribbon hanging in my bathroom so that I can see them all. This craft is a very cute way to do this. And just in time for Valentine’s day, so that you can make it as a gift for a friend or sister. If you are not the sewing kind of gal, don’t worry, just use fabric glue and it will still be super cute!

Supplies:
Felt—just get 1/8 yd of white and then whatever other colors you want (I spent less than $2 at JoAnns!)
Black buttons—I got 5/8” ones.
Embroidery floss—black, white, and whatever other color you want
Needle—one with a big enough hole that the embroidery floss can get through
Ribbon—1/2 yd (gross grain works much better than the silky stuff)
Fabric glue—optional but I think helpful

Cut out your felt pieces. You will want two pieces of the body of your owl. Two circles for the bottom of the ribbon. The wings, heart, belly, and eyes, you only need one piece. Open this attachment for some owl patterns I made. They are the size I used so you can print them and then cut them out for your pattern.

Once you have all your pieces, arrange your owl parts on the body and fix on with a smidge of glue. This will hold them in place while you sew them on. Stitch around the edge of the pieces to not just hold them down, but give the owl that home-made touch. I just did a simple in and out stitch and then tied the ends together in the back. At this point also stitch in the initial you want on your circle at the bottom.

Cut your ribbon the length that you want. Sew your end to the back piece of owl (the one with no eyes or heart) and the back piece of your circle (with no initial). I just stitched a little there and back on the machine. At this point you will also want to cut a small piece of a narrow ribbon and make a little loop to hang the owl from. Stitch this part down as well.

Attach the front of your owl and the front of your initial circle. You can use a simple in and out stitch around the edge or try a blanket stitch.
Blanket stitch

Put your button eyes on where you want them and sew them in with your black floss.


Finally, conceal your excess embroidery floss, from the edging and eyes. Pull the excess floss through to the middle of your felt sandwich with your needle and snip the end so it gets lost inside.

Now hang it up and attach some clips to try it out!

Monday, February 6, 2012

Banana Spring Rolls with coconut ice cream

On a recent date night at PF Chang’s I was craving the banana spring rolls. It gave me the idea that maybe I could try making them. So I did a bit of online searching and recipe comparing and had a go at it. Yum! They were so good, and luckily I took pictures as I went so that I could share it with you!

Banana Spring Rolls
Ingredients:
Ripe bananas (I think smaller better)
Egg Roll Wrappers
¼ c. brown sugar with some cinnamon, ginger, and cloves sprinkled in
Oil for frying (I know bad, but you just can’t bake these)
Coconut pineapple ice cream (get the Haagen-Dazs kind!)
Caramel sauce
Strawberries or raspberries

Heat the oil in a large skillet. You should heat it to 350* but I don’t have a thermometer so I just turn it on medium heat while I get everything ready. Put your brown sugar and spice mixture into one bowl and then put some water into another little bowl. Peal your bananas and cut in half (hamburger style). You could also cut them in half again (hotdog style) if you want them skinnier. Roll your banana in your sugar mixture, patting some on too. Put your egg roll wrapper down with a corner facing you. Place the banana on the wrapper like so.

Wrap the bottom of the wrapper up over the banana. Fold the sides in. Continue to roll it up. Dip your finger in the water and run along the final corner of the wrapper so that it gets sealed down. Assemble your banana rolls before you begin frying. Fry one or two spring rolls at a time, turning so that they are cooked evenly around. The oil should bubble calmly around the spring roll. If it doesn’t bubble when the spring roll is put in then it is not hot enough. It should not be boiling though! (You don’t want to get hurt!) When the spring roll has a nice golden color and little bubbles on it, remove it from the heat, letting the excess oil drain off.

Using a serrated knife, cut the spring roll in half at a nice angle. Arrange on plate with a scoop of ice cream and your raspberries or cut up strawberries. Then drizzle it all with your caramel sauce. Serve immediately so that spring rolls are warm and ice cream doesn’t melt! Enjoy!


Banana Spring Roll Caramel Sauce Anecdote:  I needed caramel sauce for the spring rolls. My thoughts were something like this: I don’t want to buy just Smucker’s caramel sauce; real bloggers would make their own caramel sauce and then show everyone just how easy it really is. Well, when your caramel sauce recipe includes the phrase “pour the cream in all at once and continue to whisk but move away as far as possible as the sauce will immediately burst into a violent boil” you should beware and recognize that this doesn’t sound good. Well, long story short I never left the side of the caramel and never stopped whisking, but somehow instantaneously it looked like this.
Hahaha! Moral of the story: if you are a real life blogger like myself, buy the Smucker’s caramel sauce right up front!

Sunday, January 15, 2012

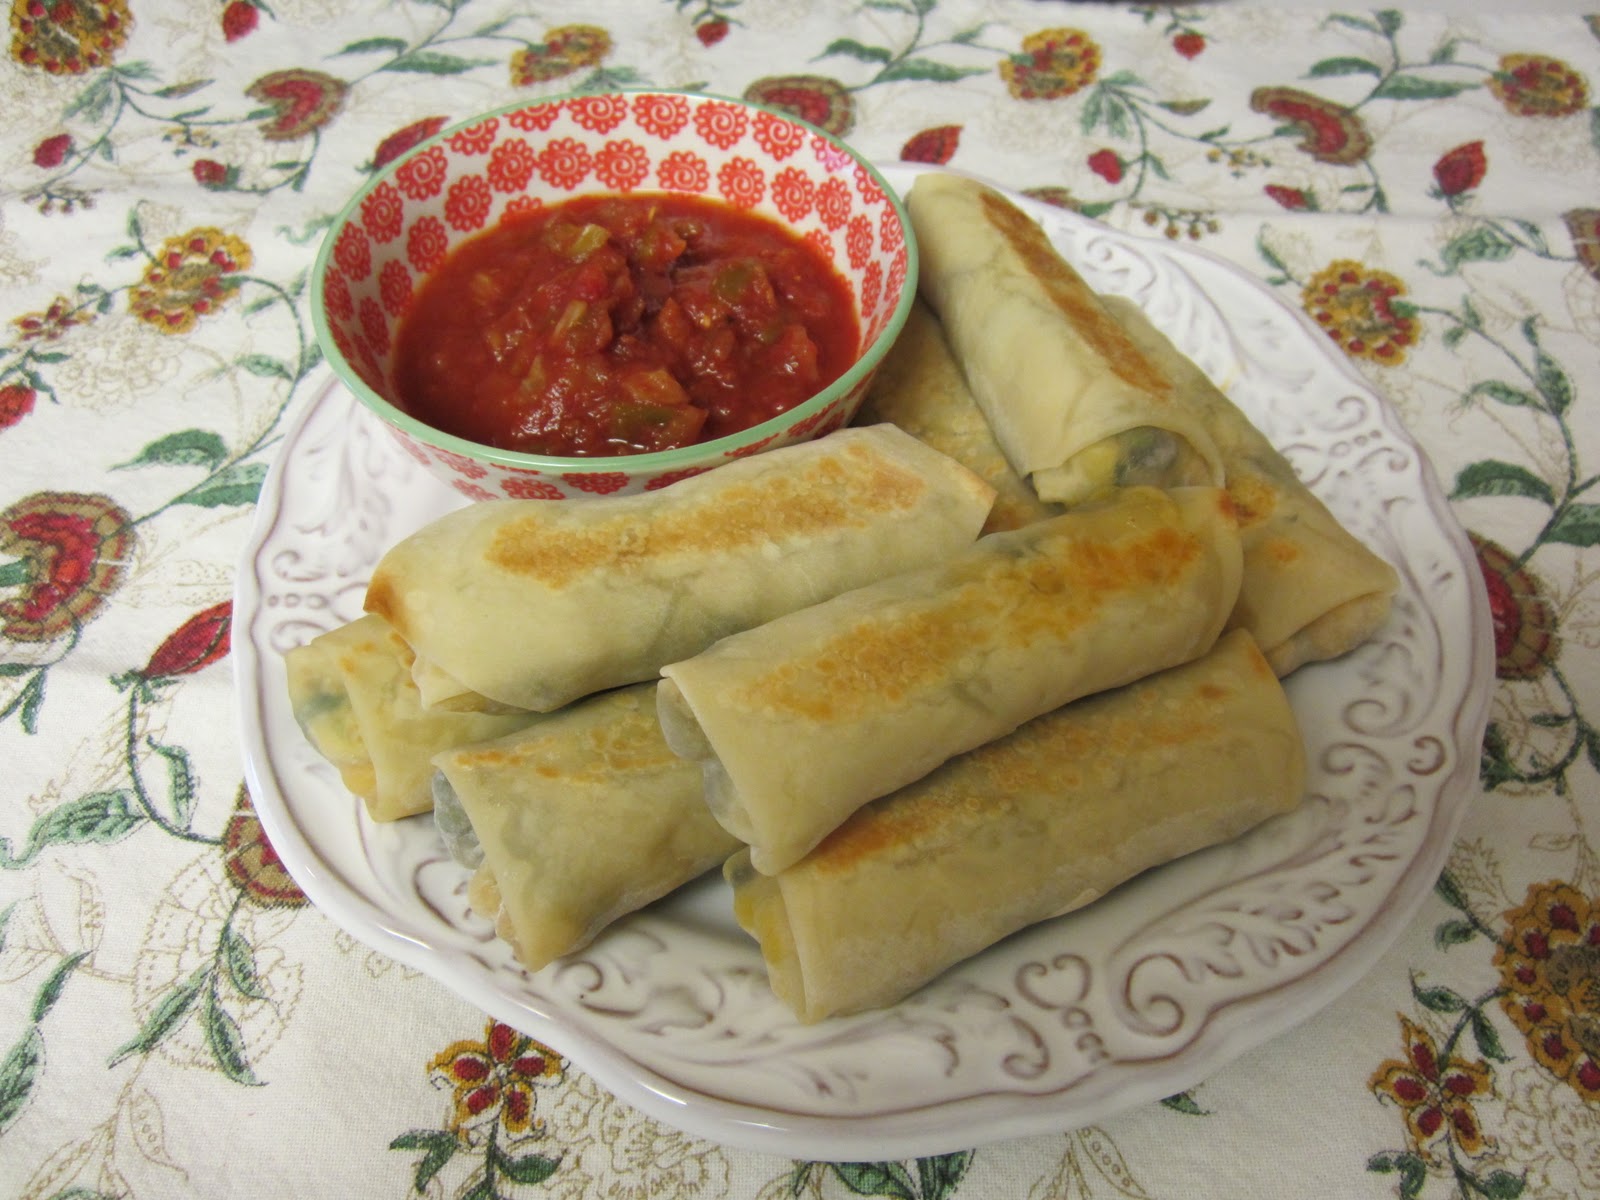
Southwest Chicken Eggrolls


Ok, so I was going to a family event (not my own family though), and I wanted to bring something of course! However, this family is not crazy for the treats and desserts like my own. So that kicked out most of my ideas. I wanted to make an appetizer, but something new and different. I combined two different recipes to get these southwest chicken eggrolls. If you yourself are looking to be a bit healthier in the New Year or are cooking for a healthy group, these are a great appetizer! Unlike most eggrolls, these are not fried, but baked.

Southwest Chicken Eggrolls

Ingredients:
1 large chicken breast, diced 
½ c. lime juice
1/3 c. olive oil
1 tsp. minced garlic
1 tsp. honey
2 c. frozen corn, thawed
1 can (15 oz.) black beans, rinsed and drained
1 package (10 oz.) frozen chopped spinach, thawed, drained, and squeezed out
2 c. shredded Mexican cheese (cheddar, jack, Monterey, and mozzarella if you want to do it yourself)
1 can (4 oz.) diced green chiles, drained
4 green onions, chopped
1 tsp. ground cumin
½ tsp. chili powder
½ tsp. pepper
¼ tsp. cayenne pepper (use more if you aren’t  a spice wienie like me)
1 package egg roll wrappers (20-25)

If you have time combine the first five ingredients and let them marinate.
Heat skillet on med-high heat. Combine first five ingredients (chicken through honey). Add to skillet and cook chicken. I try to cut chicken up even smaller while it is cooking. After letting it cook in the juices, pour the juices out of the pan. Add a smidge of butter and continue to cook the chicken a bit longer to give it a nice color.
Preheat oven to 350*. After rinsing and straining your various cans and packages, combine everything (besides the egg roll wrappers) in a large bowl. Add the chicken in too. Mix it all up. Lightly spray your cooking sheet with Pam.
Squeeze the spinach as dry as you can
The mixture isn't that appetizing...
Separate an egg roll wrapper and lay down with a corner facing you. Put a ¼ cup of your southwest mixture slightly south of the middle of the square. Start rolling from the corner closest to you shaping it into eggroll shape. Fold in each of the side corners. Finish rolling it all the way up. Dip your finger in some water to seal the corner down. Place egg roll on baking sheet with folded corner underneath.


After rolling all of your eggrolls, lightly spray the tops of the eggrolls with your cooking spray (or you could brush them lightly with melted butter). Bake for 15 minutes, rolling them halfway through. Serve warm with some salsa, guacamole, or sour cream (plain yogurt is a healthy alternative to sour cream).

Adapted from the Tasty Kitchen (Pioneer Woman Cooks) and Annie’s Eats

Tuesday, December 20, 2011

Whipped Shortbread with Candy Canes


And the baking with my mom continues! I am having a Christmas tea party with my cousins and aunties. Rather than making the traditional Christmas cookies I wanted something a bit more dainty looking. These are simple and very pretty looking. These delicate white cookies just melt in your mouth!

Whipped Candy Cane Shortbread

1 c. Butter (do not use margarine)
½ c. Powdered Sugar
1 ½ c. Flour
Mini Candy Canes

Break candy canes into pieces. I put them in a Ziploc and then hit them against the counter so that they just break up but don’t get crushed. I’m sure Williams—Sonoma makes a tool to do this!

Cream butter and sugar; add flour and beat for 10 minutes. (this works much better with an electric hand mixer, rather than a kitchen aid). Set the timer because they need to be whipped for a full 10 minutes! Drop from small spoon onto cookie sheet. Decorate with a bit of candy cane. Bake at 350* for about 10-12 minutes, until the bottoms are lightly browned. I like to bake them so that they don’t start to brown and still look nice and white. I make them small so it makes about three-dozen cookies.

Adapted from the Best of the Best Cookbook


Cranberry Pistachio Bark

The only thing better than my mom’s cooking, is being at home to cook with her!
I thought that since I have done some Christmas crafts, it was time for some Christmas baking. These are two Christmas treats that only require a couple of ingredients, which is always nice and simple!  This bark looks great at Christmas with the green pistachios and red cranberries. Also this bark makes a wonderful treat for Christmas gift-giving.

Cranberry Pistachio Bark

1 lb. good quality white chocolate (just don’t use chocolate from a craft store!)
¾-1 c. dried cranberries
¾-1 c. shelled pistachios (Be sure and buy extra so you can bribe the sheller!)

Melt chocolate in the top of a double broiler. Be sure to keep stirring. Let cool to room temperature. 

Roast pistachios at 350* for 5-7 minutes (less if you buy roasted pistachios). Line a 10”x15” edged cookies sheet with wax paper or foil. Stir cranberries and pistachios into melted chocolate. Pour onto lined cookie sheet and spread out to meet the edges. Refrigerate for at least 1 hour. Then break into pieces and enjoy!


Adapted from the Best of the Best Cookbook

Wednesday, December 14, 2011

Kissing Ball


I cannot claim the idea for the kissing ball. I saw it on Williams-Sonoma’s website but they were $50 so I thought surely I could make that! It turned out to be a very fun craft and looks fabulous! It would look great hanging on a porch or in an entry way. And you can personalize it to be more glittery or add beads or pinecones or eucalyptus too! According to the English tradition of the kissing ball, when a lady stands beneath it and receives a kiss, she removes a berry till there are no more berries, and no more kisses.

Supplies:
4” floral foam ball
Ribbon
Wire (I got the brown 22 gauge. They come in about foot long pieces near your floral ball.)
Lots of greenery (You can go for another nature run or just go to the floral department or nursery to pick up different pines. I would definitely recommend some holly and some greenery with pinecones if you can find it.)
Metal kitchen skewer or kabob stick.
Sharp scissors or pruning sheers

While you are prepping let your foam ball sit in water. Make a knot with your ribbon so that you have a loop that is as long as you want your ball to hang down. Fold a piece of wire in half and catch it in your knot so that the loop is tied to the fold in the wire.

Stick the wire straight through the ball. Fold them over on the other side into your ball. You should be able to hold your ribbon loop and your ball will hang securely below it.

Cut all your greenery into about 6” long pieces.  Use your skewer to make a hole in the foam (about an inch deep). Then stick a piece of greenery in! Yay aren’t you excited now!!!

Now you want to work systematically about this. I started by giving my ball a mohawk and then slowing make the mohawk wider. I put a branch in about every centimeter or half inch depending on the type of branch.
Mix up all your different kinds of greenery so that it has lots of dimension to it. The last little bit gets pretty difficult as you are trying to hold it, and not stab yourself too much! If looking great isn’t painless, then great looking kissing balls certainly aren’t an exception!

Once your kissing ball is completely filled in hang it up somewhere you can keep working on it. Take another piece of ribbon and cut the ends nicely. Fold it in half and then use a sewing pin to stick it in the bottom so it hangs out longer than your greenery. Now I left my kissing ball as it. However if you are after a more polished look then you want to start pruning so that the ends are more even. Just be careful pruning so that it doesn’t look like you hacked off the ends of all your branches.

I’ve heard this can last way over a month. I’m sure it lasts much longer outside. Be sure to take care of it and hang it in the shower and give it a water occasionally.

Jazz’n it up ideas:
Put some big silver bells at the bottom.
Twist a 6” piece of wire around the tip of a bead and then stick it in your ball.
Twist some little jingle bells on wire and stick them on.

Now your ball is done and ready to hang! (And maybe be kissed under!) Merry Christmas and happy kissing!